Showing posts with label reusable. Show all posts

Tips for a "Green" Kid's Birthday Party

Nothing quite tests your green-ness like having kids...and later throwing birthday parties for them. Plastic plates, balloons, and sugar-filled treats are a way of life in these activities and to do anything differently feels like going against the grain of tradition and modern-day marketing, but since I like to try and green all aspects of my life, kid birthday parties are no exception.


But now that Avery's four and Mila just turned two, I've got several parties under my belt and I feel ready to share the tips I've learned (through trial and error, research, and luck) that help me to have "greener" kid's birthday parties. So let's get started with those tips.

First and foremost comes the planning. Since I'm pretty type-A, I have created a "Party Planning Page" that I use for the girl's parties so I know I'm covering everything. Here's what it looks like:


As you can see there are areas for me to note the theme of the party, which for Mila was "Sofia the First," the colors that I will be using (dark purple, light purple, white and gold), as well as other details such as what food we would be serving, how we would decorate different areas of our home for the party, and even some plans as to what Mila would be wearing. Here's how some of it came to life for Mila's party...

Here's my dinning room, and main party decoration central. 

The party usually extends into my living room where I always do a photo
banner above our fireplace. 

So now that you know how I prepare for the party, let me share some of the ways I make it a green one...


No time for the video? Here's a look at some of the tips I shared:

1. Use pom poms instead of balloons.  If you've seen any of my other party posts from the past you know I love to use pom poms to decorate and this party was no exception. I like to use these instead of balloons because I can save them after the party is done and reuse them again in the future. Since I've used them in many of my parties over the past few years I've started a bit of a collection of them in my basement and I organize them by color or type and store them in laundry baskets. This helps them to stay fluffy, not flat and it's pleasing to the eye (or at least to my eye!).
My pom pom storage. With pom poms on top and other party supplies
(cupcake holders, pitchers, plates, etc.) on the bottom shelf.

The view from the other side.
In case you're wondering I usually get my pom poms from craft supply stores like Hobby Lobby or Party City since they have pre-cut ones and all I have to do is fluff them out. But I do occasionally make my own, here's the instructions on how I do that.

2. Use electronic invitations instead of paper ones. Usually I love to make my own invitations in Photoshop or through a seller on Etsy, but this year I was a little behind on my game and realized by the time I got the pictures ordered, printed, and mailed out it would have been too close to Mila's actual party date to do any good, so I went with electronic invitations instead.

To do this I snapped a picture of her holding a sign with the party info and text and emailed it to our friends and family who were invited to the party. Don't get me wrong, I love real invitations you can stick on your fridge or in scrapbooks, but if time is short or you feel like skipping the cost of invites, an electronic version could be a great option for you.

My little Sofia the First party "inviter"
3. Use reusable cups, plates and silverware. I've got a set of small mason jars that I like to re-use each time we have a party instead of paper/plastic cups. Usually I find a cute set of paper straws to jazz them up a bit. I found these cool chevron ones from Hobby Lobby that you can see below.


I also have a set of smaller, white dinner plates that I reuse for each party as well that way I don't have to go out and buy paper plates. Yes, this does mean you'll have to spend time after the party washing dishes, but I'll already be washing them anyway, so I figure I might as well save some money each party and just have the plates, cups, pitchers, and silverware all set. 


You may have seen above that I have paper napkins...gasp! I know, they were too cute to pass up though. In dream world I would have a set of cloth napkins to match each possible party color, but in real life, I just don't have time to make those right now, so I'm settling for these. True, I could just use the cloth napkins I already have, but their semi-worn look would clash quite a bit with the party decor. Maybe next year! 

4. Make your own food. Given my rather restrictive gluten-free, vegan, no-GMO diet it's much easier for us to make our own party food instead of trying to buy or cater it. So here's some of the yummy treats and snacks we had planned for Mila's party.


1. Fruit salad, a go-to for any party at my house since my girls are fruit fanatics!
2. Fresh veggies (carrots and celery)
3. My "Healthy Vegan Ranch Dip" (for dipping carrots or chips)
4. Trader Joe's Crinkle Cut Kettle Chips
5. My mother-in-laws favorite "Homemade Salsa"
6. Organic Tortilla Chips
7. "Knock-Off Rolos" from OhSheGlows.com (on the other side of the table)


As for the cupcakes I used this recipe from Avery's Youtube channel, "Healthy Vegan Kid" and this "Healthier Vegan Frosting" from my channel. 

5. Instead of balloons use vinyl decals for decorations.  I'm always tempted by the cool balloons at Party City, but I know they won't last long and for not much more in price you can find vinyl decals on Amazon that last for months or even years! Here's the Sofia the First Vinyl Decal I used for Mila's party.  And after we're done with the decals for the party I often end up putting them up in their bedrooms for decoration.


Here's Avery with her "Princess Pea" vinyl decal
from her "Super Why 4th Birthday".

6. Make your own outfit or find it on Etsy. My mother-in-law made this TWO glitter onesie with an iron-on decal for Mila.  And I got her purple tutu with a gold bow in the back from the seller "TeenyTiddleTots" on Etsy, here is a link to that. But using Etsy is one of my favorite ways to find unique outfits and support small business.


Here's a cute birthday outfit I got for Avery off
Etsy for her "2nd Birthday Party" with the
Lora theme. 

Now that you know some of the main ways I go green come birthday party time, here's some more pictures from Mila's 2nd Birthday party...

Waiting for the guests to arrive. Love Mila's hands? "Where's everybody?!"
Oh and curious about Avery's face? She went to a birthday party earlier in the day
and there was an amazing makeup artist who did the lovely butterfly on her face.  ( :

Opening presents with some help from Avery. 

Rockin' her Sofia crown from one of the cards. 

Must put the Sofia shoes back on!

Time to sing "Happy Birthday," except she looks a bit freaked out. 

She was all smiles once we finished the song
and told her she could eat!

Her favorite thing to do? Eat the frosting
off the op with a fork. : P

She took over the chips and salsa near the end of the party!

Here I am with my party-planning partner in crime,
my mom. She's the best.

Hope you had a good birthday Mila!
Do you have any other green kid birthday party tips to share? Post them below, I'd love to hear them. Or if you have any questions about Mila's party feel free to post those there too.

Easy Green Tips for Easter

Easter is one of those holidays I always enjoyed as a kid and as I got older I feel like I grew out of it. But now with kids of my own, it's a fun little holiday I like to celebrate with them, and like most holidays, I like to make it as green as possible. So today I'm going to share my top 3 ways to go green this Easter.


My favorite ways to go green at Easter...


1. Go vegan with your Easter eggs!  For years I haven't dyed Easter eggs because I'm vegan and don't want to use real eggs. My girls have been too young too care, until now, so it hasn't been a big issue. But since Avery is about to turn four, I thought it would be fun to find an animal-friendly alternative that we could use this year to dye eggs, and boy was I in luck!

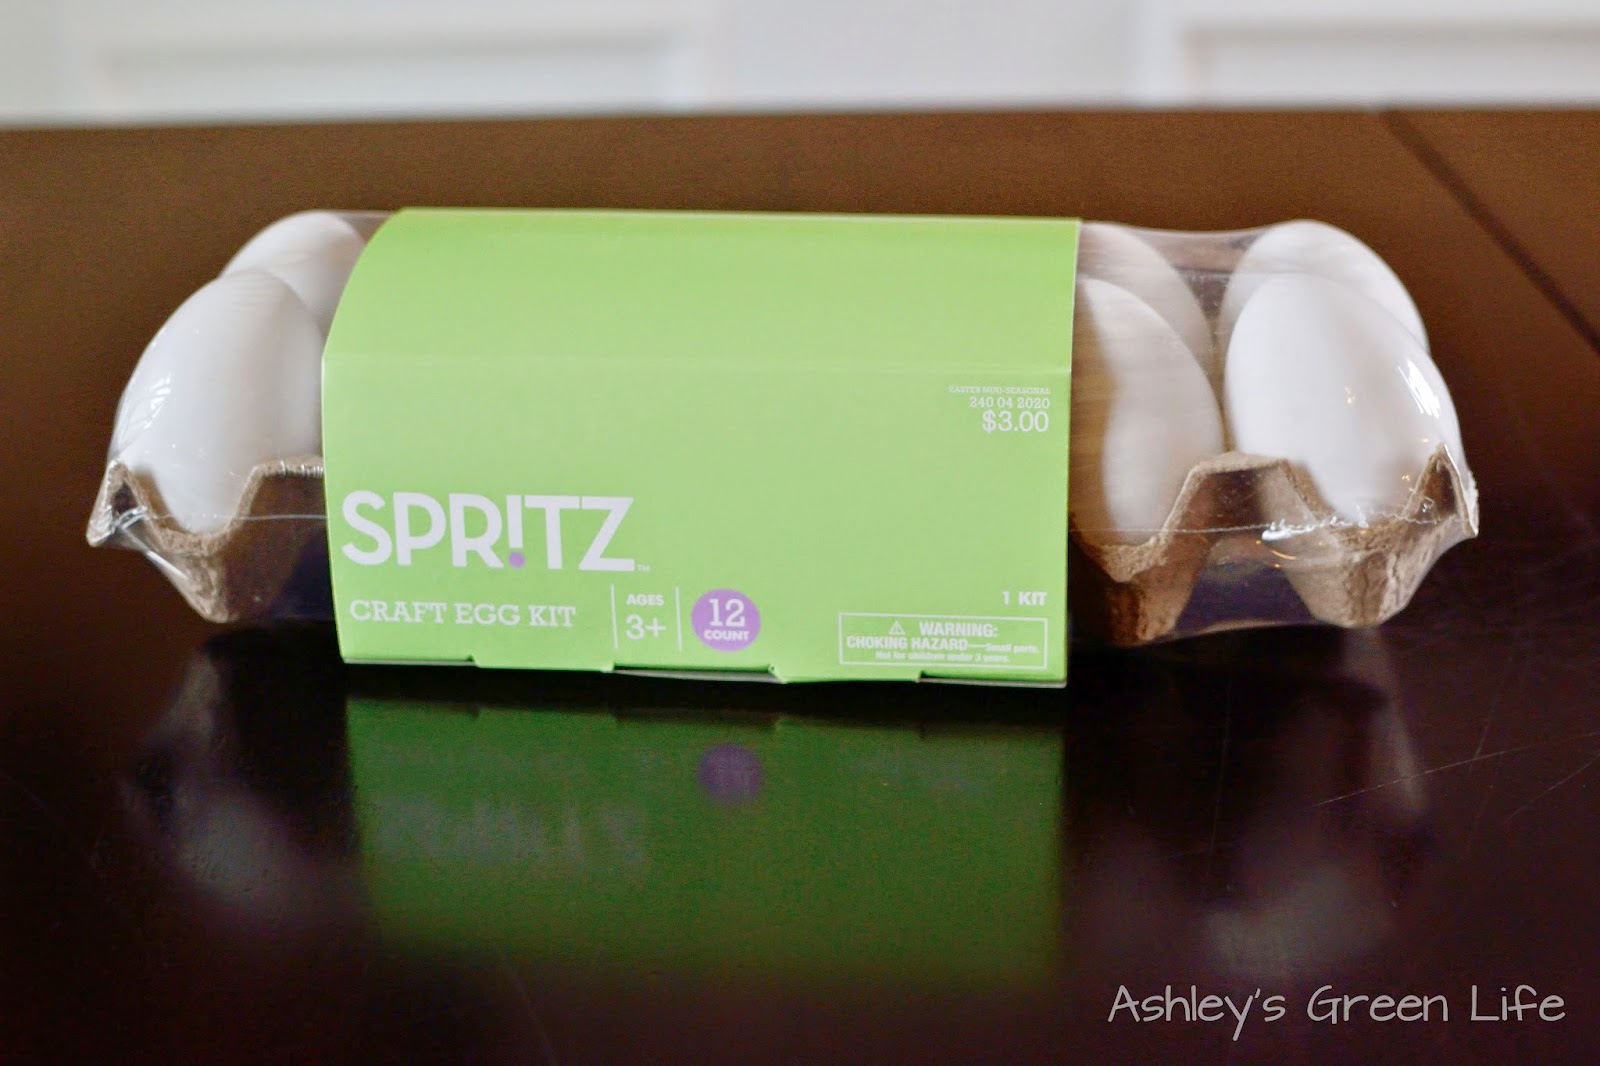
There are actually lots of options nowadays to use INSTEAD of real eggs. You can go cheap and use these plastic ones from Target for $3, or you could go fancy and get these porcelain ones from Eggnots.com for $20 for a dozen. For us, I chose the $3 option.


As you can tell they look just like the real thing.

Someone else was convinced and very excited to get to work!

From Target, I also got this "Egg Decorating Kit" for $5 that came with stickers, markers, and the dye tablets.  And I got an additional kit, which I probably could have done with out that had more stickers and markers, mainly because my girls are so young, they were fine with the decorations that came with the first decorating kit.


If you look closely you can see the 6 dye tablets we used for coloring.

Here's the steps to make and use the dye for the "fake eggs," which you may notice is different from traditional eggs both in ingredients and in results.

1. Pour 1/4 cup vinegar into a small bowl or cup.

2. Add a dye tablet and allow it to dissolve (5 minutes).

3. Now add the egg.
As you can tell, the eggs FLOAT! This makes it very hard to dye them since you constantly have to be pushing them down into the dye in order for them to pick up some of the color. On top of that the colors were not turning out very well at all.  The blue you see here was the best and strongest color, but all the others looked as white as they did (or so it seemed to me) when I first put them in the dye!


I found this to be very frustrating...and then I had to check myself. I was getting all worked about about these silly eggs and how they weren't turning out the way I wanted them (bright, bold, super festive), but Avery couldn't have cared less. She had never dyed eggs before so she had nothing to compare it to. For her the eggs were awesome! She loved trying them out in the colors, getting messy, and being creative. I love the lesson she taught me in this. (Be sure to check the lovely song she came up of what we could do even though the dye wasn't working out as I planned.)

Here I am letting go of my "Easter egg expectations" and just having fun...
let it go, let it go!
So instead of worrying about the dye, the girls jumped right in with decorating the eggs. They used stickers, markers, and little jewels and flowers to decorate the eggs however they wanted.


No surprise here, Mila decided to take a break from decorating the eggs
to decorate...herself (one of here favorite activities)!
So here's the finished eggs, and although they look nothing like eggs I've dyed in my pre-vegan days, I love them and how unique they are.


Not sure how interested Avery would be in decorating the small eggs, I knew this large egg I also got from Target ($3) would be a sure-fire hit...and it was. I got a separate sticker kit ($3) and she went to town decorating it. Be sure to see the finished egg sitting next to me in the video.

Decorating her "BIG" egg.

2. Reuse, reuse, reuse.
My second green Easter tip is just to reuse all your Easter supplies and materials year after year. I'll be the first to admit that traditional Easter supplies are not the greenest of materials. Plastic eggs, fake plastic grass, and more plastic Easter baskets all slightly make me cringe, so to counter this I reuse them. So instead of tossing them out or losing them (which happened a lot after our first Easter with Avery), I now have an organized system to keep and reuse all of our supplies so I don't have to go out and buy them every year. This helps me keep Easter supplies out of the landfill and save some money too.

The first way I reuse my supplies is to have a designated box for plastic Easter eggs. I just use a photo box and store the eggs in there. When I need them, I open the box and fill the eggs. When Easter is done, I put them right back in the box so they are ready for next year.

Storing the plastic eggs.

I also try to reuse the plastic Easter grass that looks oh so cute in the baskets and as decorations. To store this I keep it in two of our Easter baskets, one has the green grass, one has the pink.

Stroring the Easter grass.
The last item I try to reuse are Easter baskets. I know walking the aisles of Target can be tempting to splurge and get the latest or newest Easter baskets, but since my girls are still young and don't seem to mind the same old Easter baskets, I try to reuse these as well. We have four that they can choose from when searching for eggs and I store these with my Easter decorations and supplies so they are ready to be reused year after year.

Our Easter basket selection to be reused.

So that's how I try to go green and reuse our Easter supplies.


3. Use healthier candy or other alternatives.
The last tip is to use a healthier candy alternative to fill the Easter eggs. As parents you have the power to choose what your put in your child's Easter eggs (unless you go to a big Egg Hunt put on by a church or community, and in that case see my tip below).  So personally I try to find a balance between candy that is enjoyable for them (not just carrot sticks) but also healthier and not full of articfical food colorings, GMOs, and loads of sugar. Neither one of my girls have actually ever tasted traditional candy like M&Ms, Skittles, or Starbursts, for all they know the treats you'll see below are what they consider "candy" and so they are a little easier to please.  So here's a breakdown of some of my favorite "healthier" candy alternatives...


Usually I'll set up a little assembly line for filling the eggs...

I keep the portions small, here's 2 bunny cookies for 1 egg and I do
2 jelly beans for one egg too.

Obviously the marshmallow one only gets one per egg. Boy are the girls
going to be excited about this one!

One more green idea....
If you are attending a public Easter egg hunt, an idea you could try is to do a "trade" with your kids. So since you can't control what is being put in the eggs at the hunt, you could fill your own eggs at home and trade them out egg for egg so they are left with the healthier alternatives. You could then donate the candy (to someone who doesn't mind the sugar, GMOs, and other ingredients), or look into sending them to soliders overseas...similar to a program called Operation Shoebox  that donates Halloween/Easter candy to soldiers. I know it's more work, but if your child has food allergies or you want them to have healthier opitions this may be your best option to have them still feel involved in the activity, while also making sure they have safer and healthier food choices.

So there you have it, those are some of my favorite ways to go green at Easter. How do you go green at Easter? Share your tips below.

To end, here's a a fun look back at past Easters with Avery...

When she was close to 1 year old I dressed her up like a little Easter bunny...

Click here to see more of these pictures!

This is when she was close to 2 and her
personality really started coming out. 

For this Easter, my mom hid these fun little rubber bath toys in
all of her eggs...and she loved them! Be sure to watch the
very end of this week's video to see the infamous
"Easter Dance" Avery did at this Easter.

And here she is last year when she had just turned 3, rocking her "Merida"
dress from the Disney movie Brave. Love this sassy little smile!

I can't wait to see what fun Easter memories are in store for us this year now that Mila will be right there with Avery looking for eggs (and sharing in the candy as well)! Happy Easter greenies.