Showing posts with label marie kondo. Show all posts

How I Organize Papers

I’ve always loved the beauty that comes from an organized space, especially one of papers because they are known for growing out of control sometimes. But whipping them into shape, and showing them who’s boss is always a good feeling.


Years ago before I had kids, I’d spend a whole day getting my papers organized, making fancy lables, and sorting everything nice and neat in file cabinets. Fast forward a few years to now and I’ve got two kids, two jobs, and a busy household; let’s just say organizing papers is not at the top of my priorty list. So I knew I had to come up with a system that would help me stay on top of my paper organizing game and that was quick and easy to do. So today I’m going to share with you the system I’ve created and hopefully it can help you too if you feel overwhelmed with papers.

My updated paper organizing system. Let me share with you how I did it!
Learn more about "How I Organize My Papers" in this week's video....


No time for the video? No worries. Keep reading along.

Location: My papers are all stored in a “command center” as I call it, in my kitchen. Back in the day I had a large and half broken filing cabinet in my basement/office whre I would store papers. This was a good idea in theory, but the walk from my kitchen where I always opened the mail to the basement to file the item correctly whre it needed to go was way too long and it never happened. I’d end up with a pile of papers at the end of the month that needed filing and then I’d spend an hour filing them and realizing I’d missed important invations, bills, etc.

So I then switched to having it upstairs in my kitchen. I cleared out a kitchen cabinet and made room for a new command center to take place. This step has saved me a lot of time when it comes to making sure to file things in a quicker manner and I love that all the important papers I may need are just right there in the place I spend the most time.

How to store them: Binders or Boxes?
Thinking I was rocking out some A-game style organzing, I went out and bought a ton of colorful binders from Staples last year and set about to organize my papers. So I divided them by categories (health care, bank accounts, home bills, etc.) and used clear page protectors to sub-divide up the categories within the binders.  In my command center I also had a tray for things that needed “action” and things that needed to be “filed” in the above mentioned binders. This was a great idea in theory, but it did not work out so well in real life.


The one flaw in the system was the time it took to file each paper item since I had to recall the category it would go in, open that binder, flip to the correct sub-category file and then file it. This process would take so long that I would skip it alothgether and just put it in the “needs to be filed tray”. But after just a week or two, that poor tray would just be bursting and overflowing with papers, so I knew it was time to switch it up once again.


After reading The Life-Changing Magic of Tidying Up by Marie Kondo I learned her perspective on paper clutter and she suggests that it has to be quick. Wherever you’re going to put it or store it, it has to be something you can do on the spot right then and there, not file it 3 days later once you have the time to find the correct sub-category in a binder.

source

Another feature I liked of Kondo’s persepcitve on paper organization was to keep items in 3 conainters/folders that way each time you go through that folder to find something you are reminding yourself what exactly is in there, not just some long last category you never go through. That’s when I knew I was ready to swap my organized binders with subcatergories for a storage container that would have no subcatergories, and everything would be altogether…gasp!

To do this I called upon some of my favorite storage devices: cardboard magazine holders from IKEA. I used them in this post for storing photos in mementos, which really freed up some space because they store objects vertically not horizontally.


Additionally they are easy to access and store items in since they don’t have a closed lid. Even better, they are super cheap! Four for a $1. They seem to be more expensive online though if you buy from somewhere other than IKEA.

So my idea was to turn these magazine folders so that their contents could easily be accessed from the shelf and items could be put in or taken out at any time…thus solving my filing problem.

Here are the magazine folders in "demo mode".
Here's the exact magazine files I used from IKEA called, "FLUNS" (you can find them here: http://shwv.co/~kZIP). They did not have the larger size ones I used in the Konmari post, instead these FLUNS holders are a little bit smaller, but they actually worked out better because I didn't have to combine as many categories as I thought I was going to because they resembled the binder size much closer.


With this new plan in mind, I dumped my fancy binders out and did an entire paper orgianzing overhaul. I started by putting mock-magazine holders in the place of where the new categories would go and as I went through each catergory I tossed what I didn’t’ need into either recycling or my shred pile and then saved what was necessary and put that into it’s new designated spot.

Buh bye binders, here I am sorting through them all. 

While going through the binders, I had my recycling bin (yellow) close by
as well as my shred box (black) too to toss any items that weren't needed.

 It got a little messy, as most paper organizing always does. But in the end I had my new categories all set and the papers all organized.

When going through the binders and re-filing their contents, I made temporary
labels with paper until I knew for sure what I wanted the categories to be. 

Labels:
To finish out the reorganizing, I printed out new labels on my computer and glued them onto black cardstock paper. I then cut those out and taped them with packaging tape to the boxes, trying to get them all the same height if possible.


Now if you’re curious, here’s categories I have:


  • Cars & Auto Insurance: This includes bills related to obviously our cars and the insurance that goes with them. Super exciting right?
  • The Girls: This one is for anything to do with the girls. Important school documents, gymnastics bills, and bills related to things they need. I do not put kid artwork here. Both girls have containers in their room organized by year where we put artwork. Since Avery's older and quite the '"art girl" she has several binders which she has filled with her artwork in addition to the container in her closet. 

  • Ash School & Blog: Brandon's heating and cooling job doesn't have near as many papers as my teaching job and blog, so I get my own section here for storing things such as teaching contracts, important school calendars, and other documents related to my blog and youtube channel.
  • Health Care & Dogs: This is where I keep all my medical bills, health insurance documents, health savings account paperwork, and as you can tell my dogs health info too. 
  • Home Bills & Insurance: This is for all those misleanious utility bills like water, electric, gas, trash, cable, etc. Along with home insurance. I also keep other home service items here for businesses we've used in the past for our home (carpet cleaning, tree service, etc.).
  • Bank & Retirement Accounts: This is for the documents related to all of our checking, savings and retirement accounts. 
  • Warranties: You guessed it, warranties is the storing place for all the warranties that belong to various household appliances and gadgets. Now despite Marie Kondo's advice to throw all instruction manuals away, I often keep them for the items that I would like to access quickly if repair was needed like a vacuum, dishwasher, etc. 

Aside from these categories I have 3 trays below, these hold:

  • "Needs Action": This is where I store bills to be paid, invitations that need an RSVP, or anything else that needs to be taken care of soon. Ideally it is kept empty and every time I file something, I give this tray a little glance just to make sure there's nothing I'm missing that needs action. 

  • Coupons & Checkbooks: I had the hardest time remembering where I kept spare checkbooks as well as coupons for stores, so I created this main spot for them. Now I know where to look when I want to save some money or spend some money. 

  • Office Supplies: Just some envelopes, stamps, and a personalized address stamper with our name. 

I also have two boxes above where I store:


  • Pay stubs: This is mainly for my husband since he still gets paper copies of his paystubs. Mine are all electronic.
  • Receipts: We toss all of our receipts in this box so that we can hold on to them if an item needs to be returned or if we want to recall what we bought. Obviously we have to clean it out now and again so it's not overflowing, but it's location works well for us.

Reciept box.

Just in case you're wondering, I keep my recycling bin and a box for items that need shredding, in a cabinet directly below this area in my kitchen too. Along with this I keep the most important documents like birth certificates, contracts to our home, and tax returns in a fire-proof safe deposit box in another location in my home. Mainly so they can stay safe and not take up space within the items I need access to more frequently. 


So there you have it, that's how I organize my papers. Since moving to this new system, I find it is so much easier to file my papers and keep them organized. I don't have to open up a binder, find the sub-category, instead I just file it quickly and easily in the magazine folder it belongs to. And if I need something that is filed away, I know exactly where to look.  Even better, I don't have a massive "things to be filed" pile waiting for me week after week. I know everything is taken care of and where it needs to be.


What do you think, do you see anything you would like to try when it comes to organizing your papers? Or do you have a way that works best for you? Share below or ask any questions you may have, I'd be happy to answer them.


Happy organizing! ( :

*PS...Find out how I painted my kitchen cabinets from dark to white here!

How to Use the "Konmari Method" with Kids

If you haven't read the first post about the Konmari Method, click here to get the full rundown about how I used it to change my home and my life. But for this post, I'm going to share how I applied what I learned in the book The Life-Changing Magic of Tidying Up by Marie Kondo with my kid stuff.  Now although Kondo does not mention kid items in detail in the book, the premise is the same: Tidying your home can be broken down into two tasks: discarding everything that does not bring you joy and finding a place for everything you do want to keep.  So instead of going through my clothes, I went through my kid's clothes and instead of going through my books, I went through my kid's books. You get the picture, now let's get started.


In the book, Kondo recommends that instead of tidying your home by going room to room, you instead go category by category. Here's Kondo's specific order that you "must" follow:
1. Clothes
2. Books
3. Papers
4. Miscellaneous
5. Mementos/Photos

source
So I applied this same order for the most part with my kids things.  So follow along to see how I discarded and tidied their things. And in case you didn't know, I have two girls: Mila, 2 and Avery, 4.


Here's how I tackled my kid's stuff with the Konmari Method:


Clothes
Just as I did when starting the tidying marathon with my own things, I began with their clothes. So I took each girl's clothes in my room and spread them all on the floor. We're talking in season, out of season, anything of their's that was around the house.


From there I first decided which clothes no longer fit them, and put those in a pile, and for those clothes that didn't spark joy (or didn't seem to get worn often) I put them in a donate pile...oh and there was a trash pile too for all those stained or torn clothes that should not be worn again. Now since Brandon and I are done having kids I knew that all the clothes Avery was done with would go to Mila, but once Mila was done with them, so were we. So I made a category of things that had hardly been worn and in really good shape to be given to someone or sold to a consignment shop, and the ones that showed a little more wear to go to Goodwill.

Sorting into piles.
Now just like my drawers got a makeover from the Konmari Method, so did my girls. In fact, when we started this process, Mila's clothes were all still in our dresser (a habit we developed when both girls were born since we often change their diaper on our bed, it was always easier just to dress them there too).

But aside from this, my go-to strategy for storage was to toss tops into one drawer, and bottoms into another drawer with no folding whatsoever. I liked this method because it was quick to put things away, but the problem was that I could never find anything and it seemed like some clothes just got stuck in the back and stayed there. So I began to utilize the Konmari method of folding and it has changed my life!

How I used to store their clothes in drawers before...just toss it in.

What a mess!

Here was my first go at the Konmari method of folding...amazing!

With her method you fold the clothes so they stand on edge and you line them up vertically in the drawer so at all times you can see what's in the drawer and you can easily access it. This has made a world of difference in my girl's clothes and although it takes a little bit longer when I have to fold their clothes, it pays off in the long run because getting them ready is much easier to do in the mornings.

How the clothes look when folded and stood up vertically.

How they look in the drawer.

This makes it so much easier for both of them to pick out their clothes
and get dressed because they can actually see all their clothes.
Here's a peek at both of their closets and as you can tell some of their clothes like frilly dresses and skirts did get hung up and I put the rest of their shoes that they don't wear as often but are still their current size, in their closet since I didn't have room at our family shoe tray that's near our laundry room.
Avery's closet with dresses and skirts hung up.

Extra shoes and purses on top.


As you can see below since tackling the Konmari method I was able to free up an entire toy bookshelf and I decided to put it in Mila's closet instead of a dresser (since I didn't feel like spending $500 on one!). So I got these cool half-boxes from Target and now treat them like drawers. They allow me to fold all the clothes so we can see them and Mila even helps when it's time to pick them out now.

Mia's closet where you can see I also hung up skirts
and dresses and stored some of her extra shoes.

The half-boxes that I use like drawers.

Above her clothes I keep some open storage containers with her "next size up"
clothes. I have one for tops and one for bottoms. That way when she's ready for
the next size, the clothes are right there, I don't have to go all the way to the
basement where I used to store them. 

Moving forward, I've developed a system to hopefully minimize clutter regarding my girls' clothes and shoes and that is to make a "clothes center" in our hallway closet (that's in between their two rooms) and in here I store all of Avery's old shoes, clothes that need to be donated or clothes that Mila could wear in the future, and some extra hangers.

Hallway shoe storage and donation center.

I was always frustrated by storing Avery's old shoes that Mila could eventually wear because I had no place to put them and we would end up going out and buying her shoes because I didn't think she had some, only to later find out that they were in a different storage container in the basement-ugh.


So I used some old copy box lids (covered on one end in pink construction paper) and a laminated label so I can write with dry-erase marker what size each container holds of shoes and when Mila reaches that size we can get them from there and as Avery grows out of her's we can re-label a tray and put them in there. And just having that Donate container in there makes me happy too. I used to make a bag for this all the ways in the basement and it would take forever for clothes to make it all the way down there, but now it's right in the hallway and it makes it so much easier to just toss items in there once they are no longer "sparking joy."

That middle container are for clothes that no longer fit Avery and that can
be given to Mila as hand-me-downs. Once the box is full, I will take it to the
basement to be stored until she is closer to that size.
Basement clothes storage from Avery to Mila.

Books
Being a teacher, I had collected a large library of books for the girls, but the only problem was that they were all over the house and they were hardly reading them! So as Kondo suggests, you bring them all to one room, lay them out and pick each one up to decide if it sparks joy.


As you can tell by the pictures I had my girls involved with this one as they literally sat on our massive mountain of books as I/we sorted together. I made 3 piles:

  • books to take keep (their favorites or in good shape)
  • books to donate or take to school (my preschool)
  • books to throw away

Gasp, did I really just say to throw away a book? Yes, you read that right. After having two girls and a puppy teeth and rip their way through several years of books I had a pile of books that were ready to tossed in the trash. There's no joy coming from a book falling apart at the seams.

Books on the floor are "keepers" and books on the couch are for "donating".
Most of which I helped decide, but the girls had their say too.

The pile to the left is for "trash"...as for the puzzles on the floor, well that's
what happens when you tidy with a 2 & 4 year old around!
Once we finished discarding all the books we didn't want, then it was time for a new system of storing them, not all over the house, but instead in one place. The system I came up with is that from now on we are going to keep all the kid books in a "library" in the living room which consists of two shelves. The top shelf is for Avery with more advanced books, and the next shelf down is for Mila with board books, sound books, and more toddler books. Obviously some books are mixed, but we'll try to keep them slightly to divided.

Our "library" in the living room. Who knew Buddha could be such a good
bookend/librarian?

The second shelf with more Mila-like books.

Then they will each get to pick 5-10 books to keep at a time in their room and whenever they would like to or once a week, I've yet to really nail down a schedule, they can come down and return their "library books" and check out some new ones.

The books Avery has "checked out".

The books Mila has "checked out".

I'm sure it seems like I'm a total book control freak, but it's really helped minimize the book clutter all over my house and I think they are actually reading more since they are all in one place and easy for them to access. And it sure makes clean up much easier because if you find a book around the house you know where it needs to go.

By the way, I've started keeping all the girl's DVDs in a shelf just below the books too, for easy access as well.


Papers
You may be thinking, how many papers could two little girls possibly have? They don't have bills or contracts, but what they do have is a lot of ARTWORK!  Avery is my little artist and Mila is on her way too. She will make me 5 pictures a day, all of which I love to see, but had no clue where to store without hurting her feelings or filling my fridge/oven/kitchen with.

So this summer I came up with a storage solution by putting all of Avery's artwork into a binder with page protectors to hold the papers. So now every time she has drawn or made a picture we can either put it on the fridge or put it directly into the binder, which I call her "Art Scrapbook". I usually can get two pages to fit into each page protector (one facing one way, and one facing the other way so they both can be seen). Then we're done. From there, the scrapbook serves as a fun way to look back at her artwork and it's easy to transport or store.

Avery's Art Scrapbook

Just a binder and some page protectors make this art work stay nice and organized!

Now that's not the only area that has papers, their "art cart" in general had a lot of papers and other supplies that I organized when going through this method. Here's the cart I use from IKEA. And to help divide the papers on the top shelf I use these cool white cardboard dividers I first mentioned in my other Konmari post that are also from IKEA called, "Flyt" and I got 10 of them for $10.


I have the storage dividers labeled with: "To be filed in the scrapbook" (completed
pictures), "Coloring Books", and "Blank Paper" this way they can access
any paper supply they might need much easier than the pile it was before.
Oh and the "Art Scrapbook" is right there and ready to go as well.

Papers & Mementos
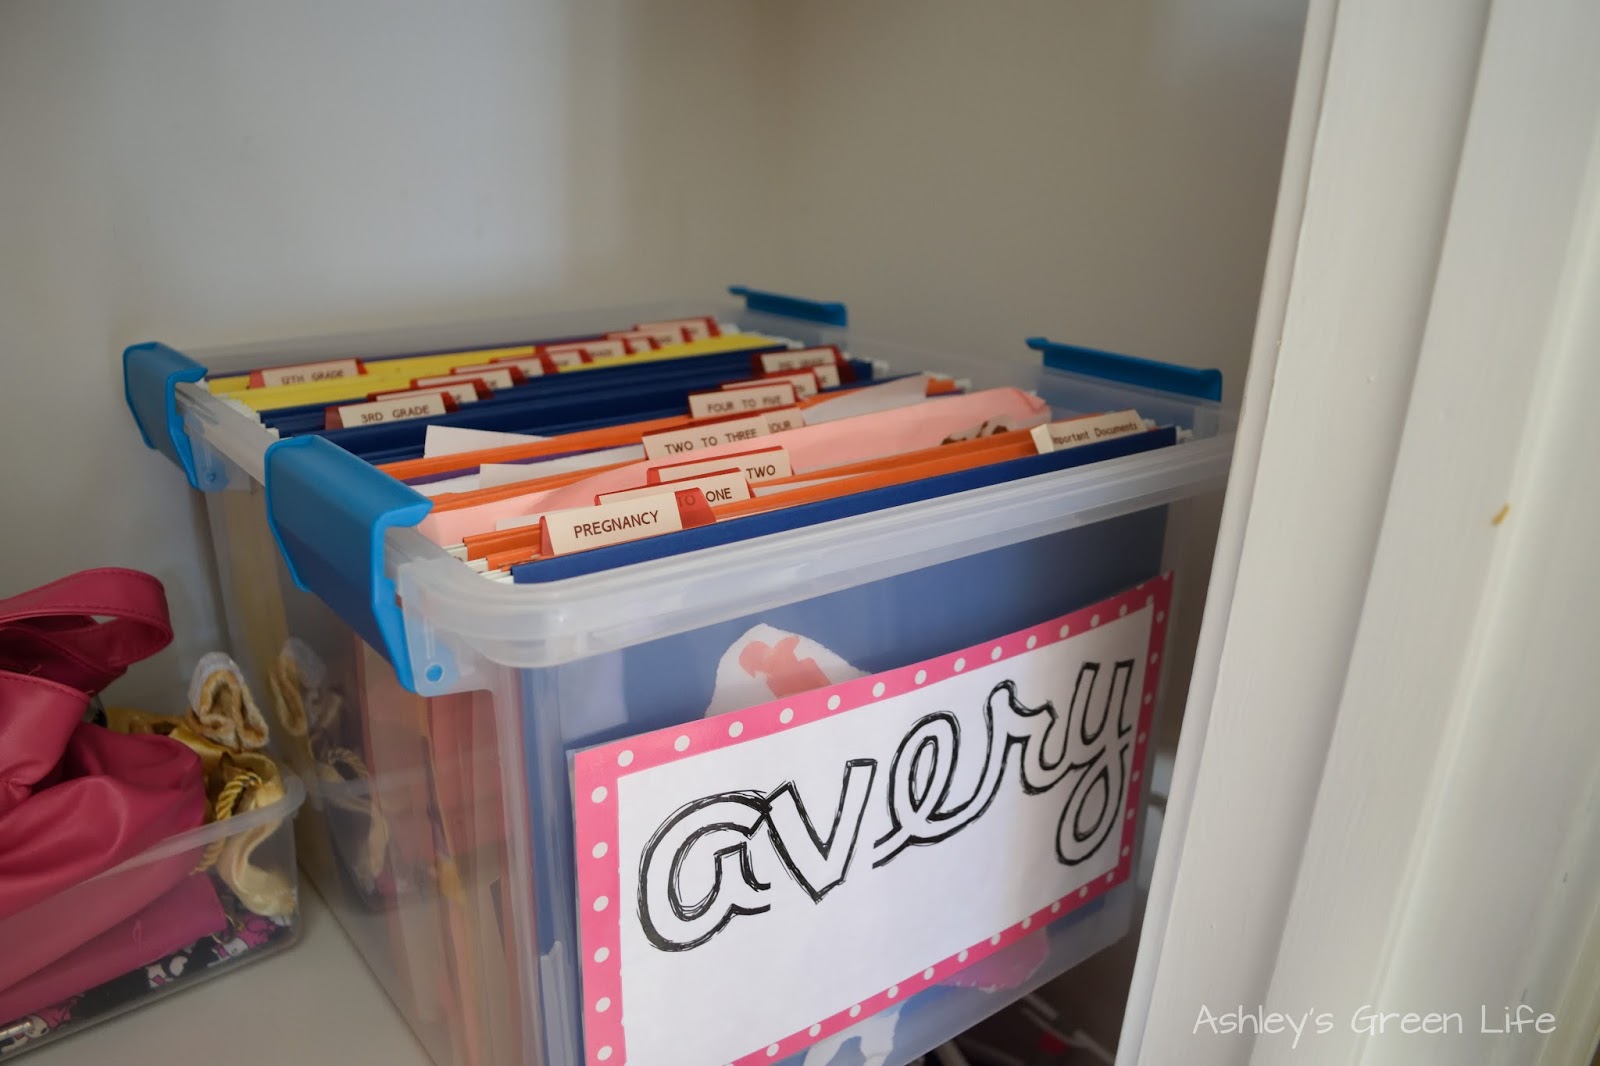
Still in the area of papers, but also a little bit with mementos are these "memory boxes" I made for the girls when I was pregnant with Mila. I saw the idea on Pinterest and thought it would be a great way to save all the special memory items from the time they are born until high school. 

Avery's memory box.

The way it works is that each girl has a box, and there are hanging files with labels for each year (birth, one to two, two to three, etc.) and anytime we have special birthday cards, pictures, artwork, etc. we can put it in the file and it's stored for them to keep for years to come.


Seeing as to how young the girls are I didn't think there would be much to discard in here, but there still was. I can't believe all the "junk" I thought they would want to remember-lol. So after cleaning it out, I actually upgraded to a smaller storage container that way the boxes can now fit in their closets, instead of where I previously had them....in the basement.

Mia's memory box.
This way if they ever want to look at them or if we have something to file in them it will be much easier to do.

Speaking of mementos, Mila obviously is too young to care to much at this point, but Avery is quite the collector of memories and mementos. And for that I gave her a little pink shoe box that sits by her   nightstand. This is where she can keep birthday cards, notes from friends, and anything else that "sparks joy" for her.


The idea would be that once it starts to get full, we will go through it, make one last go at if it still sparks joy and if it does, we can file it in the memory box for the current year and if it doesn't we can toss it. That way the shoe box is empty and ready to go with more special little mementos. 


Miscellaneous
I truly saved the best for last with this one...the toys!  This is one area that I had struggled with keeping "tidy" for years. It seemed like no matter how much I tried to keep the girl's toys organized, they never stayed that way for long and before I knew it, toys were mixed up, in the wrong places and   the girls were frustrated they couldn't find all the pieces.

So in true "Konmari" style, I gathered up all the toys from the entire house, except for some that I knew we were keeping and that were already organized in certain locations. I then took the toys to sort and dumped them on the floor in my basement (when my girls were not around our they would have had a field day!). And from there I began to sort.


I had 3 categories:
  • keep (toys that got used often, were in good shape, and sparked joy or so it seemed for my girls)
  • donate (in good shape but not sparking joy for my girls)
  • trash (broken toys, old toys, etc.)


Check out all those trash items...yes! I'm sure some of them
look in good shape, but trust me, most either had a broken
piece or chew marks from when our dog was a puppy.

The rest got sorted. Some to donate, and the rest to keep. From there I began organizing
them. Putting like items together so for once they could actually be stored together.
I couldn't believe how many places in the house I had items that were the same
like "little people" or "doll house furniture"!
Once I had cleared the clutter of the toys and only had the toys we wanted to keep left, it was time to narrow down where to store them. Kondo always suggests to keep same items together in one place in the home, not all spread out, with a little in each room. So I followed suit and designated certain rooms for certain toys. Here's how it breaks down at our house:

Living room: Li'l' Woodzeez (animal characters and homes from Target)


Duplo and pretend food and plates for the pink kitchen we have in our dinning room are also stored in the living room.


You can see a pretend doctor's kit and Mr. Potato Head
also have their place in here.

As well as some wooden blocks.
Avery's room: Dollhouse and Barbie dolls. For Christmas, my mom converted a bookshelf Avery had into a dollhouse by painting it and filling it with cute little furniture most of which she either made herself from items around the house or at craft stores (and a few pieces were actually from the dollhouse I had as a kid!). Anyways, we knew this mega toy would be best in her room and so that is where it stays and all the Barbies and Disney character dolls "live" in Avery's room too.


I have one drawer or her dresser designated for doll storage and the one below it is for extra furniture and doll clothes. 


Mila's room: I used to keep this Little Tikes dollhouse in our basement for them to play with, but since Avery had her dollhouse, we knew Mila needed something fun to play in her room so we moved it upstairs. Now she has the dollhouse, and the pretend furniture and little people (I also put any spare little princesses, animals, or other plastic characters in here) that go along with it too.

Mila's dollhouse. 

Here's her toy storage shelf.

My Little Pony dolls and a Leap Frog alphabet game are also in here too.
Basement: As I've said before, my basement used to be full of toys and at a time, it needed to be full of toys. When Mila was a baby, she often seemed to join me for my workouts down there and I needed things to keep her busy. But lately it had just turned into one more area to clutter up with books, pretend people, dress up clothes and much more. So I made the decision not to store any more toys down here and instead just make it our activity room. Before we used to have a trampoline in here, but since they got a bounce house for Christmas it takes up most of the room. We have a climbing tunnel, low balance beam, and gymnastics mats that we get out as well from time to time, but there are no more toys down here. 


I'm not against any toys coming down while they are playing, it's just that when they are done, the toys go back up too. It saves us a lot of time with clean up and it is really helping to keep it tidy all the time. 

One last thing...stuffed animals.
I don't know about you, but my girls have a large collection of stuffed animals. I can't blame them. As  a kid I had a big collection too, but they had so many I had to keep a large storage container of the basement just of the extra ones. But once I read Kondo's book I knew that was about to change.

So just as we did all the other categories, we took all the stuffed animals and laid them out on the floor. I had each of them pick as many as they could fit into the storage containers in their room. 

Here's Avery's stuffed animal storage
container which she likes to double as
a desk at times.
And the basic premise was that they could keep the ones that "sparked joy" for them and fit into their container, but after that we gave the rest to Goodwill. And they still know that if they get more and it starts to not fit, we'll go through them and see if there's any they could "give to someone else" so they have more room.

Here's Mila's little stuffed animal/doll storage at the bottom of her shelf. 

How I'm making cleaning up easier
Now that you know how I went through each area of my kid's stuff, one way that I'm helping to keep it a little cleaner is to label where everything needs to go with pictures. It's probably the preschool teacher in me that loves to do this, but either way it seems to really help them know where something goes when it's time to clean up. I can't remember how many times I would get after them for "not cleaning up" and then realizing I had no clue where to put the item either. 

But now, everything has it's place and it has a picture so it's easy for them to find it. 

Labels on their clothes storage areas are helpful for them and for Brandon and I.

Mila has some too, so they aren't just for toys!
Well, that's my experience with the Konmari Method as outlined in the book: The Life-Changing Magic of TidyingUp by Marie Kondo. If you have ever read the book or applied it to your kid's stuff, share below!  
Happy tidying greenies!